Gang Sheet Builder
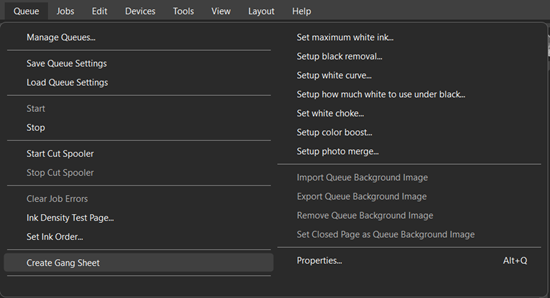
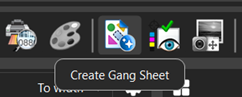
The Gang Sheet Builder offers a quick and easy way to generate job groups, while presenting the user with large array of additional options and customization for jobs and workflows. The Gang Sheet Builder can be accessed by navigating to the Queue menu and selecting Create Gang Sheet. This will prompt the Create Gang Sheet window to open. Alternatively, the Create Gang Sheet button in the SmartBar will also open the builder.
Importing Files and Saving Gang Sheet Layouts
To construct a gang sheet, images must be loaded into the gang sheet builder. The gang sheet builder provides multiple avenues of importing files to accommodate most workflows.
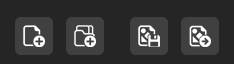
Add File/Folder
Using the add file button opens the file browser. Navigate to any desired image file and select to import the file into the Gang Sheet Builder. Multiple files can be selected using ctrl+click. Alternatively, the add folder button can be used. This follows the same workflow, but an entire folder is selected and imported, rather than individual files.
Save Gang Sheet
When saving the gang sheet layout, there are two options how the layout is saved:
Gang Sheet Layout: This method saves only the gang sheet layout. When attempting to load a gang sheet layout file, it will load the jobs inside the gang sheet by following the file paths of the imported images. It is important to keep these local file paths preserved, or the gang sheet builder will be unable to find the images.
Bundled Gang Sheet: This saves the gang sheet layout and all imported files into a .zip folder. This is ideal if the gang sheet needs to be sent to another operator or system to be opened, as it does not rely on any local file paths.
Load Gang Sheet
A previously saved gang sheet layout from Digital Factory can be loaded into the builder. Depending on the method used to save the gang sheet, it may include the job files or may depend on following local system paths to find the job files.
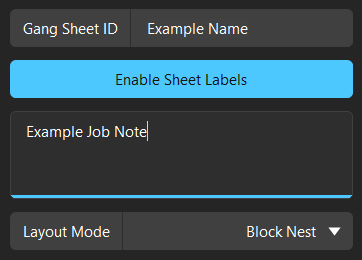
Customizing Gang Sheet Attributes
The gang sheet layout can be named using the gang sheet ID field. Adjust the layout mode between Block Nest or Manual using the dropdown. Moving a job manually through the preview area will automatically change the layout mode to manual.
Adjusting the Properties of Individual Jobs
By selecting an individual job from the job list, many properties of the individual job can be adjusted. Any adjustments to a job that would alter the image visually are shown in the preview area on the right side of the gang sheet builder.
-
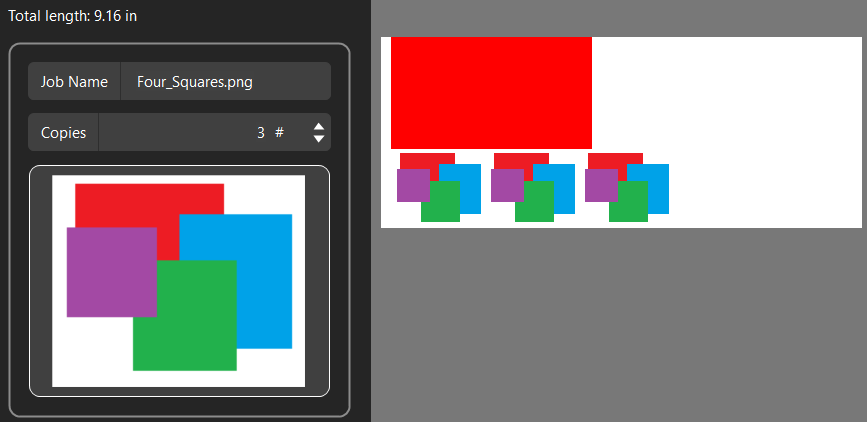
Job Name – Displays the current name of the job (file name by default). The name can be changed as desired.
-
Copies – Increase or decrease copies by either entering a number manually or using the arrows to increment the copy amount.
-
X and Y coordinates – Adjust the position of the selected image by either entering a number manually for the coordinate, or increment using the arrows.
-
Job Width and Height – Adjust the dimensions of the image. The ratio lock is on by default but can be unlocked to only adjust the desired proportion.
-
Job Scale – Increase or decrease the scale of the job. Use the reset button to set back to 100%.
-
Rotate Job – Use to rotate the selected job in 90-degree increments. If no job is selected, it will rotate the last selected job (whichever is displayed in the individual preview).
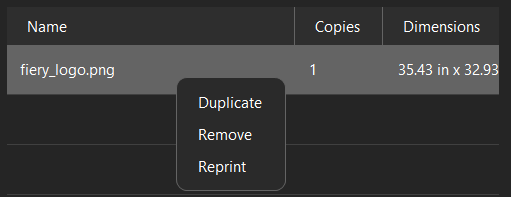
By right clicking on an imported job, you can access additional actions that can be performed.
-
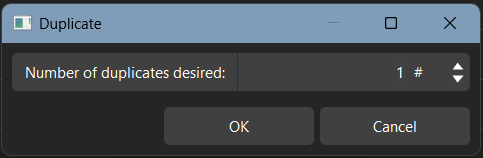
Duplicate - Opens a window that allows adding duplicates. Duplicates can be independently positioned and resized.
-
Remove - Removes the selected job from the gang sheet.
-
Reprint - By selecting multiple jobs and choosing reprint, you can create a gang sheet with only the selected items. This is ideal in the event a print disruption or error occurs, and only a select number of jobs out of the entire gang sheet need to be redone.
Preview Area
The preview area displays a live preview of how the gang sheet layout would be imported into the Digital Factory workspace. Changes to individual files such as size or position adjustments will reflect in the preview as they are made.
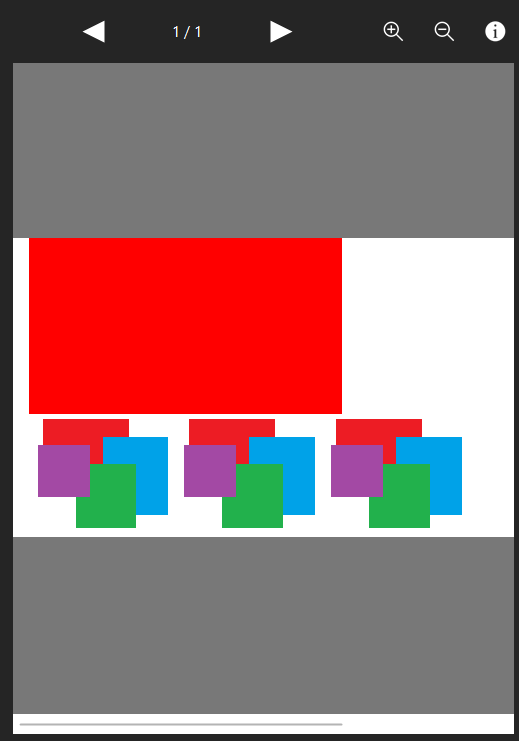
The preview area contains controls to zoom in our out, as well as the Create or Cancel buttons. Use to finalize the creation of the gang sheet layout or cancel to close the window and return to the main Digital Factory workspace.
Gang Sheet Settings
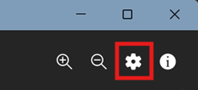
The gang sheet builder has a wide variety of settings to allow users to customize the workflow of the gang sheet builder to best suit their needs. Access the gang sheet settings using the gear icon in the top right corner of the builder, above the preview area.
The settings are divided into multiple sections with their respective controls available.
Page Settings
Media Type – Adjust the type of media using dropdown menu.
Media Name – Displays the current media name. Use the dropdown to select another media available to your device under the currently selected type.
Delete Media – Use this button to remove a new page media if one was added using the dropdown menu.
Edit Media – Edit the media dimensions of a custom page if one was added using the dropdown menu.
Margin Settings
Margin Boxes – Adjust the margin on specific page edges using the provided boxes.
Margin Toggle – Toggle the margins on or off.
File Settings
Enable Sheet Labels – Toggle on labels and notes.
Custom Notes – Enter any desired notes into the box. They can be displayed on the gang sheet output.
Print All Job Names – Print a list of each imported job name on the gang sheet.
Job Names Position – Only available if Print All Job Names is enabled. Choose if the list of job names is output on the top or bottom of the gang sheet.
Crop Settings
The basic overview of Crop Settings is listed below. For a more involved breakdown, see Automatic Cropping.
Auto Crop Toggle – Enable or Disable auto cropping.
Crop Threshold – Adjust the values at which pixels are considered transparent.
Crop Offset – Adjust the value to add an additional buffer around the image that is not cropped.
Crop White – Enable to crop white in addition to transparency. Uses the Crop Threshold value to determine what quantifies as white.
Nest Settings
Spacing between jobs – Manually adjust the spacing between each job placed in the gang sheet layout.
Spacing between copies – Manually adjust the spacing between copies of the same job.
View Settings
View Grid – Toggle grid visibility in the preview area.
Barcode Support
The Gang Sheet Builder is supported by barcode automation. Users can configure Digital Factory in a way that allows the gang sheet builder to be opened, import images, then create and print the gang sheet layout using barcodes.
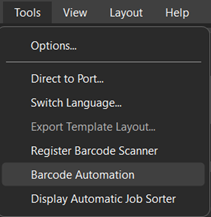
To set up barcode automation, navigate to Tools > Barcode Automation in the main workspace of Digital Factory.
Once opened, enter the barcode numbers into the following fields:
-
Set Automation Barcode for Gang Sheet Start - This barcode, when scanned, will open the Gang Sheet Builder interface.
-
Set Automation Barcode for Gang Sheet Creation - This barcode, when scanned, will finalize the Gang Sheet, automatically sending the created Gang Sheet to output.
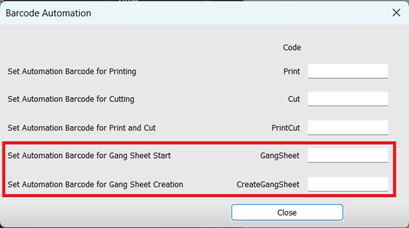
Once the barcodes have been entered close the window. Barcode Automation can now be used for the gang sheet creation and output process. Digital Factory natively supports barcodes for importing. If the barcode contains a file name, Digital Factory will automatically import the file. No additional setup is required.
Fiery family of software products
Making your machines run better
Copyright © 2026, Fiery LLC. Tous droits réservés. Politique de confidentialité.