Auto-Kerning
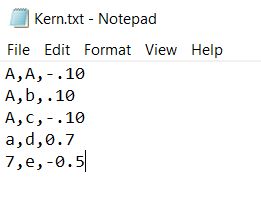
Auto-Kerning allows users to automatically adjust the kerning between specific letter pairs using a simple text file. To begin the process, the first step is to prepare a text file to use in the Auto-Kerning process. The text file must adhere to specific rules to be read properly for Auto-Kerning:
-
Each line of the file must be <first character>, <second character>, and <adjustment value>.
-
The file must be comma delimited.
-
Each letter pair and adjustment must be on its own line.
-
Lines must be ordered by Uppercase, Lowercase, Numerical, and Punctual, in that order.
Additionally, it’s important to understand how the values entered apply to the kerning:
-
The adjustment value entered is multiplied by the height of the font. That value is how much the kerning is adjusted for the specified letter pair.
-
The adjustment value is additive/subtractive from the existing kerning amount; it does not overwrite the existing kerning.
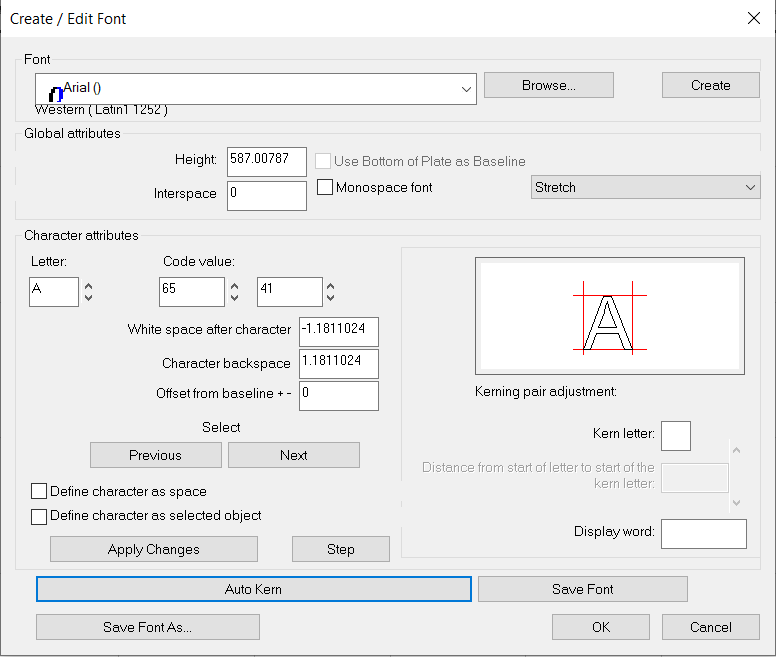
Once the file is created and saved, it can be used for Auto-Kerning. To do so, navigate to Edit > Edit Font.

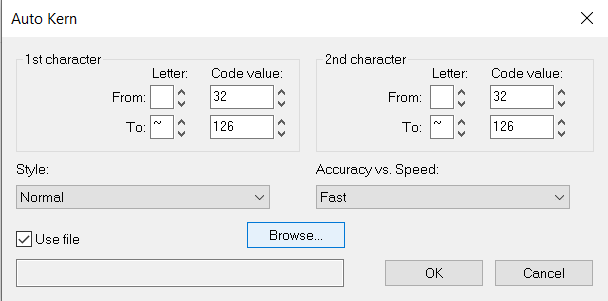
In the Create / Edit Font window, select the font auto-kern should apply to, and click the Auto-Kern button. In the Auto-Kern window, toggle on the “Use File” checkbox. Click the browse button, navigate to the created text file, and select OK. Lastly, click OK in the Auto-Kern window to finalize.
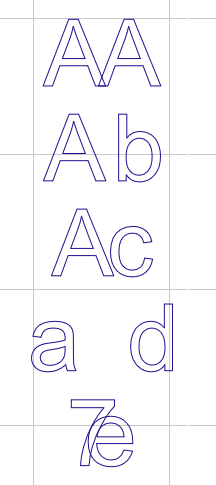
After completing the process, use the Text Compose tool to test the kerning values. We can see the values entered in our text file reflected in the created text.
If the values need to be adjusted, or new lines added for additional letter pairs, edit the text file with the new additions.
Fiery family of software products
Making your machines run better
Copyright © 2025, Fiery LLC. All rights reserved. Privacy Policy.