Note: These materials are offered only in English as supplementary examples for a deeper dive into
Separations and Halftones
Film separations are printed onto a clear film and are used for screen printing, offset printing, sandblasting, and other applications. To produce photo-realistic prints, prepare the job as a set of CMYK separations, which use halftone dot screening and result in ink reduction. Separations can be created from various file types or in a design application and imported. The separation halftones are configured individually and then aligned to form a final image. A best practice is to test your ink for placement accuracy and density. For higher resolution prints, greater accuracy is required.
| Creating Separations | Working with Separations | Testing |
| Part I: Importing jobs | Part I: Selecting Pages and Viewing Raw Data | Ink testing for accuracy and density |
Separations, Halftones, and Cells Explained
Halftones are images composed of dots rather than continuous tones. They are controlled by three parameters: frequency (LPI), angle, and spot function, which together make up a cell. A cell is a square group of pixels and its size is determined by the frequency (LPI).
Each color separation is a halftone; using a single ink, a gradient dot pattern is applied and the shades (tints) are created by the dots.
- Dot Shape: Dots can be a wide variety of shapes and selection depends only on your opinion of which one produces the best detail.
When working with halftones, it's important to distinguish the tint regions:
- Highlights (0-10%) - smaller dots, lighter shades, less coverage
- Midtones (10-90%)
- Shadows (90-100%) - larger dots, darker shades, more coverage
Most printers are 1-bit devices — they only have one shade of each primary CMYK — so they can put down the dot or not. To generate the effect of thousands of colors, the dots are arranged in a process called screening. Devices with higher resolutions have more effective screening and can produce more colors.
It is important to know what composes a cell:
- Frequency (LPI): Measured in Lines Per Inch (LPI), the frequency is the number of halftone cells per inch.
- A frequency of 60 LPI = 60 cells every inch.
- At 300 DPI, this would give you a cell size of 5x5 pixels (300/60).
- At 600 DPI, this would give you a cell size of 10x10 pixels (600/60).
- Higher resolution devices allow for higher LPI, but the best LPI depends on the resolution of the output device and what you are printing.
- A higher LPI results in smaller cells with fewer shades. This can create a polarization effect on objects that use many colors.
- A lower LPI results in bigger cells and more shades. This can create the effect of a lower resolution.
- Increasing the LPI results in fewer shades but appears more consistent and the cell is hidden.
- The number of shades per cell is determined by the size of the cell: (Resolution /LPI)^2
- A 5x5 cell can display 5 x 5 = 25 shades.
- On a CMYK device, this means 25 x 25 x 25 for CMY and
- At 300 DPI:
- 20 LPI is 300/20 = 15x15 cell = 225 shades.
- 60 LPI is 300/60 = 5x5 cell = 25 shades.
- 100 LPI is 300/100 = 3x3 cell = 9 shades.
- A frequency of 60 LPI = 60 cells every inch.
- Angle: The angle allows you to rotate the cell on the page. When printing CMYK separations, offsetting the colors at different angles is beneficial. There are common patterns in use and some of them are better at hiding halftone cells than others.
- Spot: Spot is how the cell gets filled or painted at different DPI and LPI levels.
Creating Separations
- If you want
OR
If you have created separations in your design application, go to Queue > Properties, select the Layer tab, then select the Halftones tab. - Select Enable application halftoning
- To enable the dot shape set in the design application, select Enable application spot function.
- If you want to import a multiple page PDF and you would like each page to be its own job, go to Tools > Options and select Always split multiple page PDF files into separate PDF files.
Note: This option is recommended when using In-RIP Separations. - Go to File > Import and import a job.
The job is imported with separations.
- In
- Select In-RIP Separations.
The Curve Sets options become available.
Note: When selected, CMYK planes can be enabled and disabled on the Halftones tab. - Select Calibration for curve calibration or Press Calibration for curve calibration for a printing press.
Working with Separations
Part I: Selecting Pages and Viewing Raw Data
- Select the job in
- In the Layout Preview, select the Page tab or click the job.
- Right-click on the job to change page order or remove pages.
OR
Go to the Job tab and click Pages, then select or deselect separations by clicking them, then click Apply. - To view raw data, select a separation, and right-click and select View Raw Data, or select the job and go to View > View Raw Data.
Each CMYK separation has highlights, midtones, and shadows that must be aligned for the final image. The halftone settings must be specified for each separation, including dot shape, frequency, and angle.
- If you want to enable halftone information set in your design application, select Enable application halftoning.
- To enable the dot shape set in your design application, select Enable application spot function.
Note: Y values are generally printed last so yellow dots are not obscured.
- Go to Queue > Properties, select the Layer tab, then the Halftones tab.
- Ensure halftoning is enabled.
- Enable or disable plates.
- For each ink, set the frequency (measured in LPI; the resolution of the dot shape), angle (to ensure consistency in production), and shape for each ink (depending on the detail desired).
-
Select Use super cell to group four normal halftone cells into one, increasing the number of gray levels without increasing the frequency of the halftone.
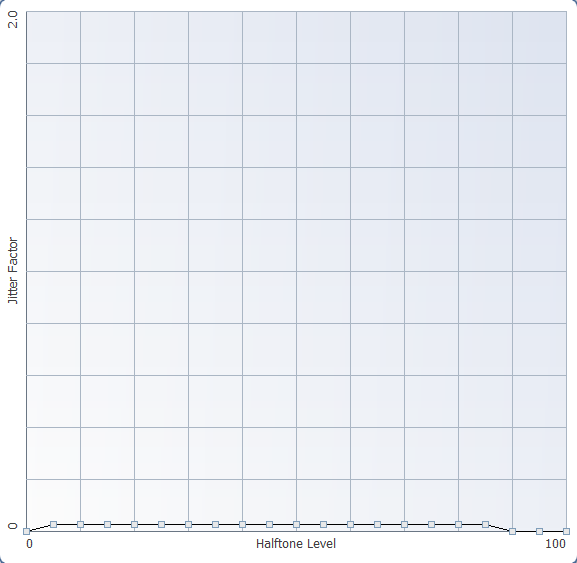
Click to view jitter factor vs. halftone level graph. Modify halftone screens to improve print quality by clicking and dragging to adjust. Jitter introduces miniscule distortions to the dot shape making the overall pattern within the dots less discernible.
Save and Load a preset as a .jitt,
Halftone Level: The increasing size of a halftone cell, from 0% tint (empty) to 100% tint (completely filled in cell).
Jitter Factor: The amount of randomness applied within any given range of the Halftone Level. By default, there is zero jitter.
To distort a pattern, select a suitable range and increase the jitter for that range. Increasing above 1.0 can cause the halftone to lose structure.
Ranges:
- Highlights (0-10%)
- Midtones (10-90%)
- Shadows (90-100%)
You can use jitter to increase the appearance of shades at a high LPI. When the frequency of lines is increased, the number of shades is reduced.
To increase appearance of shades, set the jitter graph as shown in the below image:
There are two curve set options, calibration and press calibration, so you can adjust ink levels independently.
Select a color value in the drop-down list below the graph, then select one of the options:
- By levels
- Use the sliders to adjust values.
- By density
- Use the arrows to adjust values or manually adjust using the graph (click and drag to adjust).
- Click Calculate Density to view calculations by density or percentage.
If you're creating separations, enable In-RIP Separations.
Variable Dot Setup Screening Types
Testing
Ink testing for accuracy and density
Inks
We recommend doing some test prints to ensure the ink and substrate combination is going to work well for you.
You can test ink quality by substituting cartridges and completing test prints with all other settings the same.
An ideal black ink is one that blocks UV light and dries quickly for good dot placement. Not all inks are the same, and may provide good dot placement but low density or vice versa.
At higher resolutions, there are more dots that become smaller, which require greater accuracy.
It may be very hard to tell if the ink is good unless you use a magnifying glass. With magnification, if you can see whether the dots are accurate and dense enough.
Conditions such as environment can also affect inks.
Films
For inkjet separations, there are two main films: clear and waterproof.
Clear:
- generic
- cheaper
- no special coating
Waterproof:
- specific to separations
- more expensive
- special coating that allows quick drying and when dry, waterproof
- varies by manufacturer
The amount of ink required varies between films, but a really good film allows for enough ink absorption for a good density. You may require more or less ink depending on the film due to absorption rates. The best way to determine ink usage is to test.
Fiery family of software products
Making your machines run better
Copyright © 2026, Fiery LLC. All rights reserved. Privacy Policy.