ジョブメニュー
ジョブメニューには以下の項目があります。
|
以下の表を参考に設定してください。 |
|
|---|---|
| ジョブを復元 |
キューからアーカイブされたジョブを復元します。
|
| すべて選択 | 選択されたキューのジョブをすべて選択します。 |
| 選択なし | |
| 除去 | 選択されたジョブをキューから削除します。 |
| 書き換え | |
| ページを開く | |
| ジョブの検索 | [ジョブの検索]ダイアログを開きます(ジョブの検索を参照)。 |
| リリース | 選択された保留中のジョブをリリースします。 |
| 保留 | |
| 中止 | 選択されたジョブの処理が終わる前にジョブを中止します。 |
| エラーをクリア | |
| 色調整 |
[色調整]ダイアログを開きます。 注:使用可能なオプションは出力デバイスにより異なります。
|
| レイアウトに追加 | 予定されていない選択されたジョブをアクティブキューの[予約済み]セクションに追加します。 |
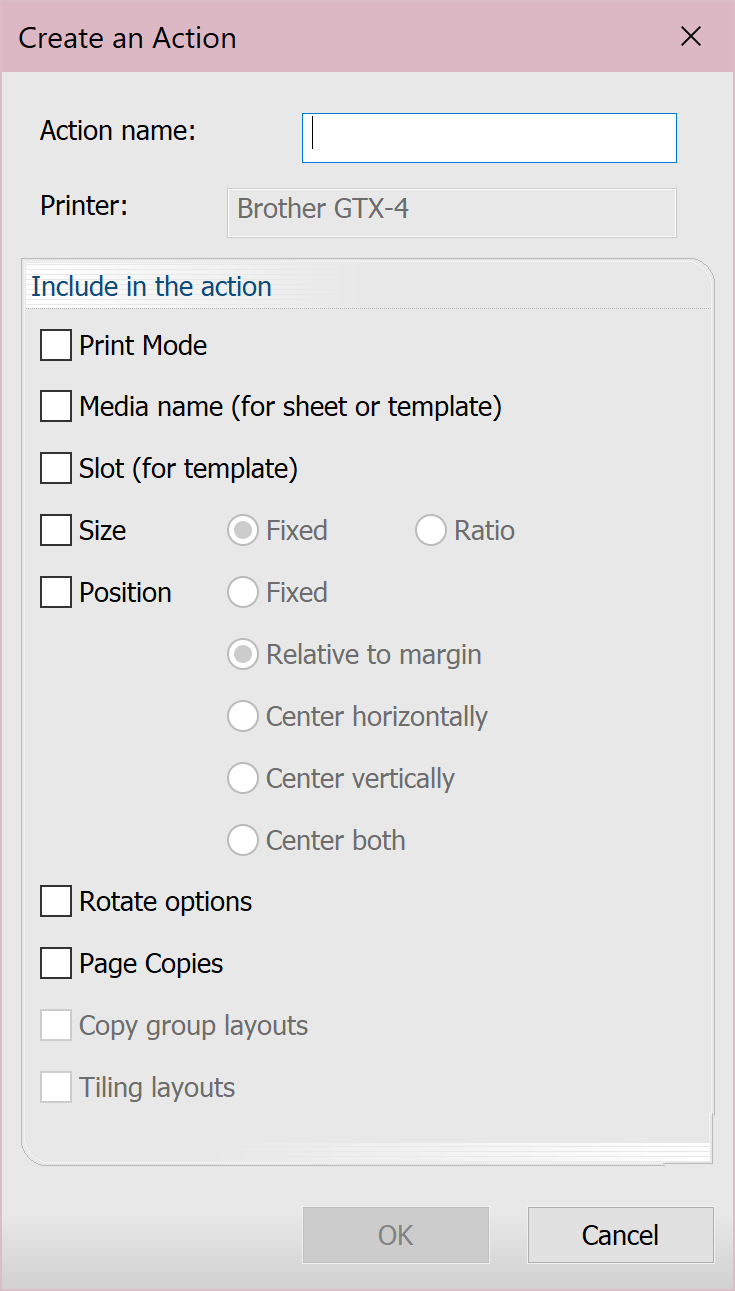
| Actions |
Actions are pre-sets or automations applied on jobs (to handle repetitive layouts or settings). They are saved per device.When you have a job in the queue, after you've applied all the chosen settings, you can create an action to save and apply these settings to other jobs. Each action must be named and can include the following (when selected, uses the current job's settings):
To see the Actions dialog on job import, go to Queue Properties > Layout Manager and select Show Actions dialog on job import. Note: "Actions" are created by you."Fiery Actions" are automated actions that happen when using the Automatic Job Sorter and are based on the information encoded in selected files.For more information about both, see Using Actions.
|
| 印刷 | |
| RIPのみ(スプール) | |
| 名前を付けて保存 | |
| プレビュー画像の生成 | 選択された内容のプレビューを生成します。 |
| プロパティ |
[ジョブチケットのプロパティ]ダイアログを開きます。選択されたジョブの設定を行います。詳細については、キューのプロパティを参照してください。 注:ジョブのプロパティを修正すると、[キューのプロパティ]の設定が上書きされます。ジョブが[ジョブの予約]からアーカイブされたりキューに引き戻されたりしても、ジョブのプロパティは維持されます。ジョブのプロパティが指定されていない場合、ジョブの処理には[キューのプロパティ]が使用されます。 |
| ジョブのカラー置換 |
[ジョブのカラー置換]ダイアログを開きます。カラー置換を実行するには、画像上の色をクリックします。これが入力カラーです。出力カラー列を使用して変更を加え、[追加]をクリックします。完了したら、[適用]をクリックします。 To measure a new color using a spectrophotometer, click Measure. Click Convert to convert to CMYK. Use the slider to set a color tolerance and opacity. To remove a replacement, click the X. To apply to all incoming jobs for this queue, select the check box next to the replacement color. Click Make this color a device spot to open the Device Spot dialog.デバイスメニューを参照してください。 変更を確認するには、プレビューウインドウの上部に表示される[カラー置換のプレビュー]をクリックするか、[ジョブ] > [RIPのみ]の順に移動し、[表示] > [生データの表示]の順にクリックします(または両オプション用のジョブを右クリックします)。 Color Removal tab To remove a color, click the color on the image.これが入力カラーです。Use the output color column to make changes, then click Add.When you're finished, click Apply. Use the slider to set a color tolerance. To remove a color, click the X.
|
Fiery family of software products
Making your machines run better
著作権 © 2026, Fiery LLC.全著作権所有。個人情報保護方針.