Production Spooler Interface
The following elements make up the workspace.
Toolbar Controls

From left to right:
- Remove job: Permanently delete the selected job(s).
- Release job: Release a job on hold for printing.
- Hold job: Stop the job and place on hold.
- Cut job: Cut the job.
- Abort jobs: Stop processing the job(s).
- Start/Stop Cut Spooler: For the selected queue, process jobs as they are received, or stop jobs regardless of scheduling settings.
- Toggle job reserve: Click to view or hide the Job Reserve window.
- Interrogate cutter: Update the media width in the context panel.
- Compass: Click to open context-sensitive help.
- Find job: Enter a job name to locate the job in the queue (see Finding Jobs).
Queues
A queue is a repository that manages jobs prior to processing them. Each queue is based on a device.
On the top left side of the window, the queues are shown as tabs. To manage a queue, double-click the queue, go to Queue > Properties, or go to Queue > Manage Queues and click the ellipsis button next to the queue name ( ).
).
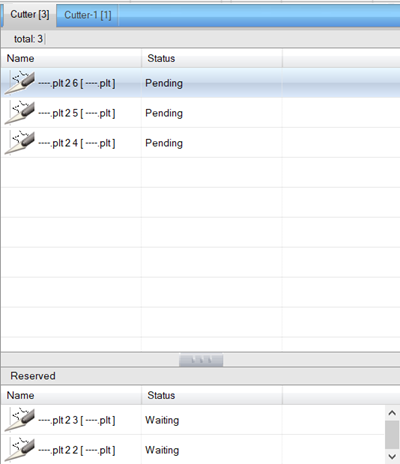
Under the queue tabs, the jobs are shown in a list, with reserved and completed jobs moving to the list at the bottom (if the Job Reserve is enabled).
Preview Manager
On the top right side of the window, the job is shown as a preview. There are four buttons at the top and two drop-downs: show preview (select one) or units (depending on the queue), color replacement preview, original preview, zoom in, zoom out, and a zoom to percentage drop-down list.
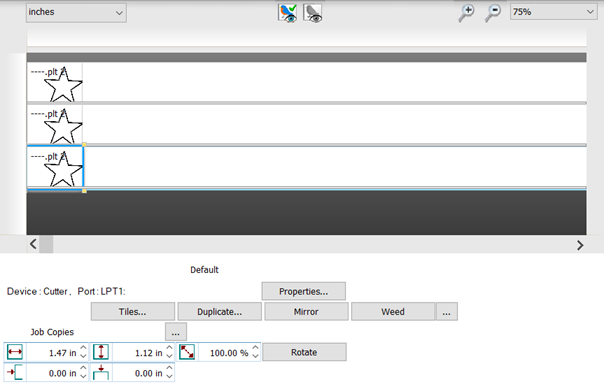
At the bottom, if you have not selected the media in the queue tab, the device and port are displayed, along with a Properties button, which opens the Queue Properties dialog, a field to configure media width, and an Interrogate Cutter button. If you select the job in the queue tab, the display changes and the following items are available:
- Contour cut button appears in the Preview pane. Click to launch the Contour Cut dialog. At the top, select the check box to only show the contour. At the bottom, select a contour option from the drop-down list. Select Also cut inner contours if desired. Set the offset amount and select a corner style. Under the Soft Edge Contour Cut section, use the small arrows or drag the slider to reduce or increase the offset. Select the contour accuracy from the drop-down list.
- Device and port are displayed.
- Click Properties to open the Queue Properties dialog (see Queue Properties).
- Click Tiles to launch the Tiling Setup dialog (see Tiling Setup dialog).
- Click Duplicate to enter the number of duplicates desired in the Number of Duplicates dialog.
- Click Mirror to flip the item horizontally.
- Click Weed to be able to remove the negative spaces of your design.
- Click the ellipsis button next to the Weed button () to open the Weeding dialog. Select Border weeding or Object by object weeding. If Border weeding is selected, set the weed line overlap and the weed border offset. If Object by object weeding is selected, click on the preview image and drag to make a box around the object.
- Click the ellipsis button next to the Job Copies label () to open the Modify Step and Repeat dialog. Select Area fill if you want to fill the entire area with copies (then set the length and width), or set the number of rows and columns (the total copies shows directly below), set the X and Y spacing, and if you wish to have partial items showing, click Generate partial items.
Note: When this setting is used, the controls for Tiles, Duplicate, Mirror, and Weed are not longer available for this item. - Set the item width and height.
- Set the item scale factor.
- Click Rotate to rotate the item by 90° clockwise.
- Set the horizontal and vertical position.
Fiery family of software products
Making your machines run better
Copyright © 2026, Fiery LLC. All rights reserved. Privacy Policy.