Note: These materials are offered only in English as supplementary examples for a deeper dive into
Installation Instructions
This document explains how to install Fiery products.
To skip to a section, use the links below:
Downloading the Application
If you already have the files locally, skip this section: Installing the Application.
- Open your web browser (Internet Explorer / Google Chrome / Firefox / Opera) and navigate to www.fiery.com.
- Hover over Products and then Specialty Production and select your product.
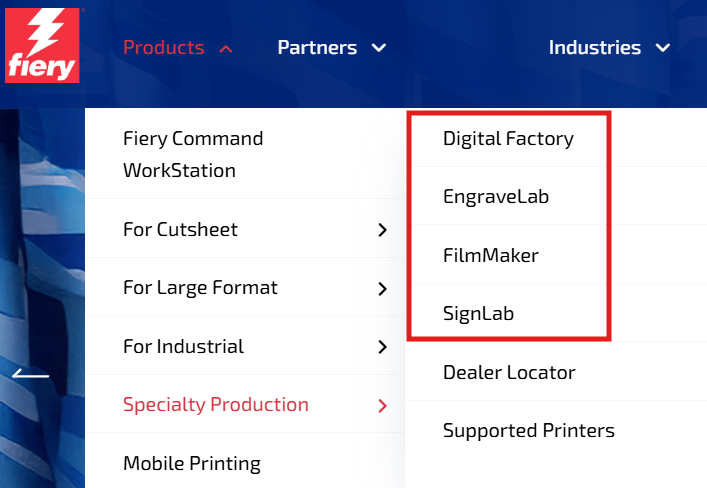
-
- After determining which version you would like to install, click the Free Trial button located on the page.

- By clicking Free Trial, the executable file will automatically download.Launch the executable from your downloads folder to begin software installation.
Note: If you have any security restrictions, such as Network/Internet Security, Anti-Virus, or Firewall applications installed and configured, you may need to contact IT for the access to perform the installation.
Installing the Application
-

- Double-click to run the file, or if you have security or access restrictions, right-click and select Run as administrator.
If the User Account Control appears, click Yes to allow the application to make changes to your computer.
The Installation Wizard appears. - Some trial installations may require you to select a version of the software to install.Select the desired version if applicable, and click Next.The required files will begin to download.
- Select the language and click OK.
- Click Next again to proceed through the installation, review the license agreement, select I accept the terms of the license agreement, and click Next.
Note: The directory by default will be C:\CADlink\(It is recommended to leave the default directory but can be changed if required.Click Browse and find the desired location), then click Next.
Depending on system performance, installation can take 5-20 minutes. - When prompted to install cutting devices, make a selection and click Next.
You'll need to select the device and the drivers. - When prompted about font installation, Skip or Continue.
You will need fonts installed for any text.You will also be prompted to search your drives for additional fonts to install.We recommend installing them. - When the installation is complete, click Finish.
Your product is now installed and a Windows Explorer window should appear with a short cut from the Start menu to launch each products in your package.You can create a shortcut on your Desktop or pin the icon to the taskbar (right-click the design icon and select Pin to taskbar.
Launching the Application
- Launch the product from the desired shortcut and the application will load as required.
- To install devices, see 安装输出设备安装输出设备.
- To set up the devices, see 机器设置对话框 管理设备.
- To set up the ports, see 选择端口 端口设置.
- If your device is a printer / laser printer, you may need to obtain the drivers from the manufacturer that is supported within your operating system.
Note: If you are using an adapter, you may also need to obtain the drivers for the cable you are using; Parallel to USB or Serial to USB cables have specific drivers to make them work with Windows. - Once the required drivers are installed and the port has been set, you should be able to test a cut or send a print via File > Print to a Windows printer.
Steps only for Visual Production Manager:
- If you want to use Visual Production Manager, go to File > Launch Visual Production Manager.
- Select Install Printer and select the printer, click OK and Next to install the driver, then Next and Finish to complete the driver installation for that device.
- Select a print mode then click Next.
Complete the same steps to install a cutter when prompted. - Continue through the wizard and select your desired material type, size, layout mode, registration system, and whether the jobs will be on Hold on import or otherwise.
- Once the wizard is complete, navigate to Queue > Manage Queues and ensure you have the correct port selected for the desired device(s).
Installation and set up is now complete.We recommend sending test prints/cuts.
Activating your Software
To activate your software, you must register using a valid activation code.This process will automatically begin at the activation window for an expired trial product.
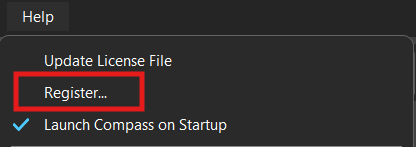
-
Navigate to Help > Register to open the activation window.
-
Enter your activation code and user information into the appropriate fields.
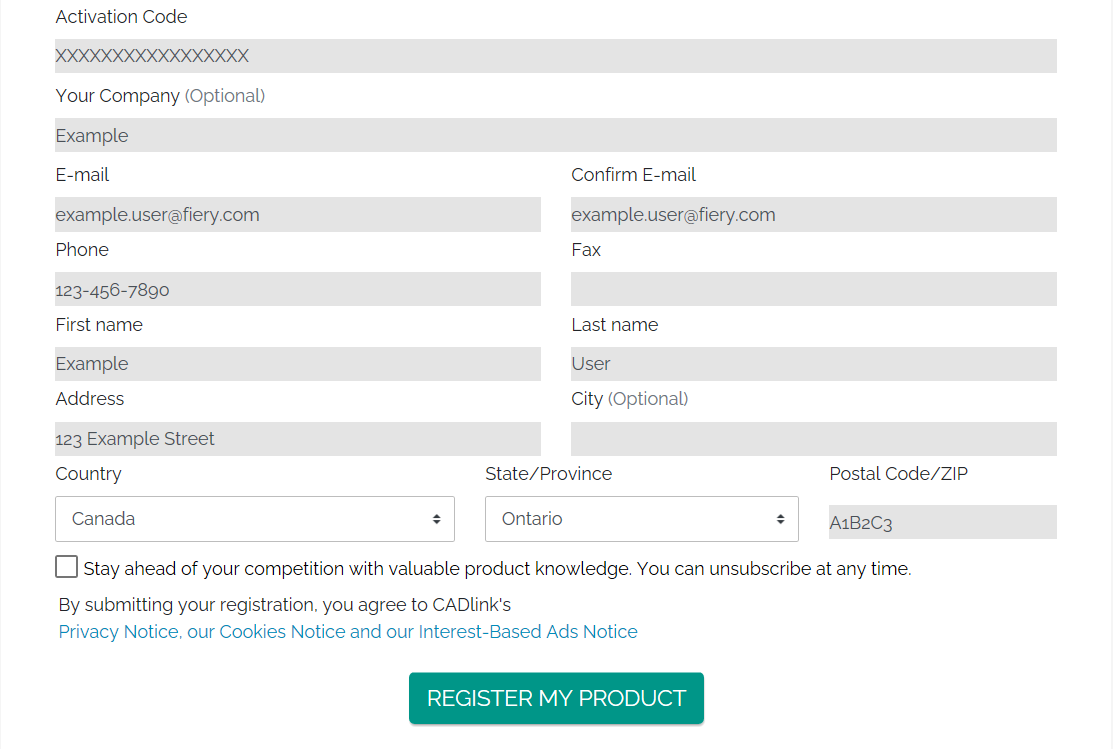
-
Click Register My Product.If the activation code has previously been used, it is possible to perform a self-reset and activate the code on a new system.See Activation Self-Reset for more information.
-
A notice of successful registration will populate the screen provided a valid activation code was used.The activation will take effect upon restarting the software.
Fiery family of software products
Making your machines run better
版权所有 © 2026, Fiery LLC.保留所有权利。隐私政策。