Layout Menu
The following items are located under the Layout menu.
- Size
- Move: Relative or absolute move defined by X, Y, polar distance, and angle.
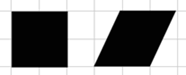
- Slant
- Rotate
- Rotate 90°
- Rotate -90°
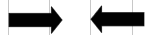
- Mirror
- Vertical
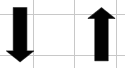
- Horizontal
- Vertical
- Flip
- Clear Size/Move: Reset.
Alignment and Spacing: Select alignment and spacing options and use the SmartBar to configure (to get exact alignment and spacing needed, several options may be selected together):
Note: Hover over the SmartBar for options.
- Alignment

- Align to Baseline: Click workspace to set baseline start and end. Edit anchor points and angle.

- Align
- Align to Last Object
- Left
- Right
- Top
- Bottom
- Centers Horizontally
- Centers Vertically
- Align to
- Left
- Right
- Top
- Bottom
- Center
- Centers Horizontally
- Centers Vertically
- Equal Spacing
- Equal Vertical Spacing
- Equal Horizontal Spacing
- Align to Selected
- Left
- Right
- Top
- Bottom
- Centers Vertically
- Centers Horizontally
- Equal Vertical Spacing
- Equal Horizontal Spacing
- Spacing
- Vertical Spacing
- Horizontal Spacing
- Vertical Spacing
- Equal Spacing
- Weighted Spacing
Group: Group selected objects.
Ungroup: Ungroup any group within selected area.
Ungroup All: Ungroup any groups and sub-groups within selected area without ungrouping paragraphs of text into single lines.
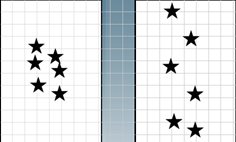
Array: Create an array of objects. Select array style, spacing, spin, and number of copies.


Create Grid Object: Generate a grid object. Click and drag to generate the grid edges. Drag the vertical and horizontal edge to create a grid tile. Select the tile, and click fill grid to generate the rest of the tiles. Dimension field boxes can be used to fine tune grid and tile size.


Sequence: Create a sequence for a collection of objects and/or change object sequence direction using one of the options below:
- Start Sequence
- Start Sequence by Vector
- Start Sequence by List
- Start Sequence by Traits (nearest means objects that are closest to each other; database means based on object creation; horizontal means as they appear from left to right; vertical means as they appear from bottom to top)
- Select the first object.
- Go to Layout > [Select one of the options above].
- Click each object until all are included, or alternately, click-and-drag across all objects in a sequence until all are included.
- [Optional] Right-click and drag objects in new direction.
- When finished, click the workspace.
The objects are ordered with the first chosen object at the top.
Decorative Border: Add a decorative border to the selected object (see Shape Tools).

Weed Selected: Add a weed border around the selected object.
Badges / Multiples: Create badges, also referred to as multiples. (see Badges / Multiples).
Badges / Multiples Wizard: Launches the Badges / Multiples Wizard, which allows users to process badging jobs using saved CDL and corresponding INI files. For additional information, see Badges / Multiples Wizard.
Variable Data Wizard: Use the wizard to replace or serialize data, including linked images, text, and numerals.
Page Control: Opens page control options.
Templates: Convert objects into workspace elements saved with the workspace. Set the date, a logo, or other element.
Effect changes to templates using the options below:
- Run
- Edit
- Save
- Set Template
- Clear Template
To set a template:
- Create an object (file, text, date, time).
- Select the object and go to Layout > Templates > Set Template.
The Set Template dialog appears. - Select the type and click OK.
-
 Clip Art Viewer and Distressed Effect, Distressed Effects Continued
Set
Fiery family of software products
Making your machines run better
Copyright © 2025, Fiery LLC. All rights reserved. Privacy Policy.