Create ICC
You can create an ICC profile for an existing or new print mode to help ensure your input and output colors are perfectly in sync.
Note: Prior to starting, ensure you have the correct media, printer, and print mode, as well as a spectrophotometer.
Note: If you create an ICC profile using a trial version, to use it, you must re-build the ICC profile using the full version.
 Trial Print Modes and ICC Profiles
 Creating ICC profiles in 3rd party applications
Step 1

- Go to Devices > Manage Print Modes.
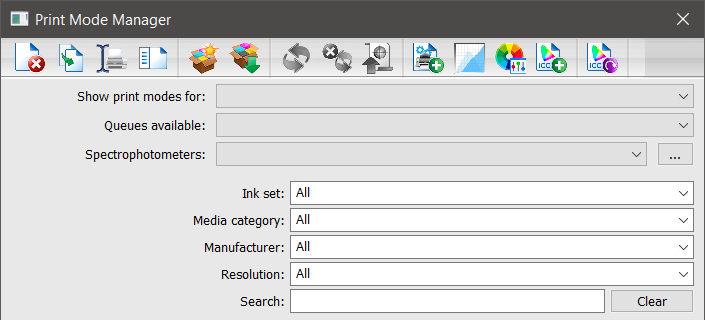
The Print Mode Manager dialog appears. - Use the Show print modes for drop-down to select a device.
- Use the Queues available drop-down to select a queue.
- Use the Spectrophotometers drop-down to select your spectrophotometer.
- [Optional] Use the Ink set, Media category, Manufacturer, and Resolution drop-down lists to further narrow options and use the search field to find the print mode.
- Select a print mode from the list below.
- Click Create ICC.
The Name Print Mode dialog appears. - Enter a name and click OK.
Note: The name is automatically appended by “ICC” to help identify your selection.
The ICC Creation Wizard appears. - Use the Page drop-down to select a page size.
Step 2
Printing, Loading, Measuring, and Verifying a Color Chart
Step 3
- When finished printing, loading, and measuring charts, click Next.
The Calibration curves page appears. - Input your preferences and click Back, Next, or Cancel.
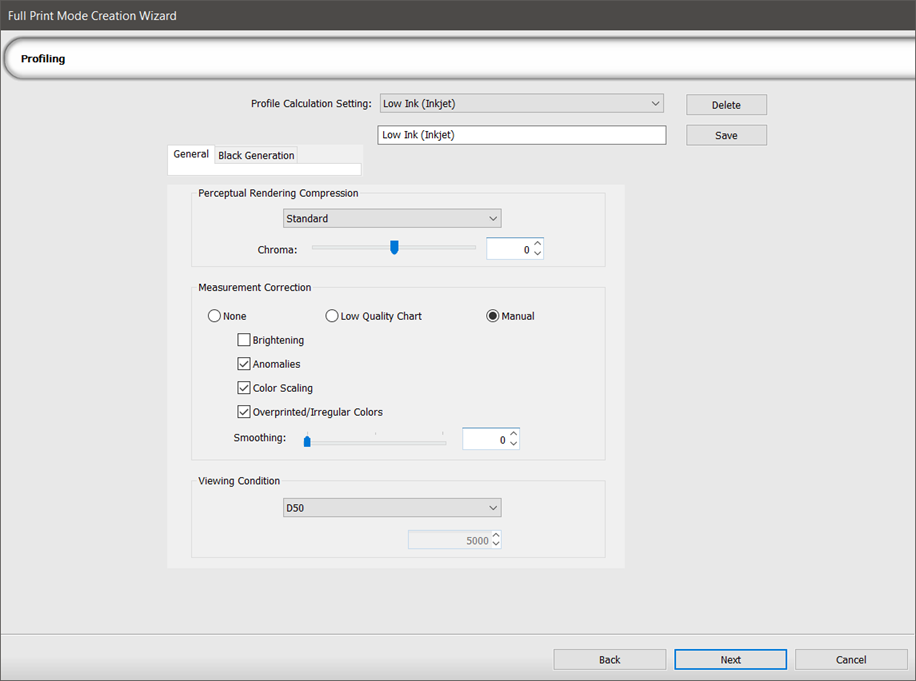
- On the Profiling tab, select from the following Profile Calculation Settings:
- Enter a name if you are building a custom profile and click Save.
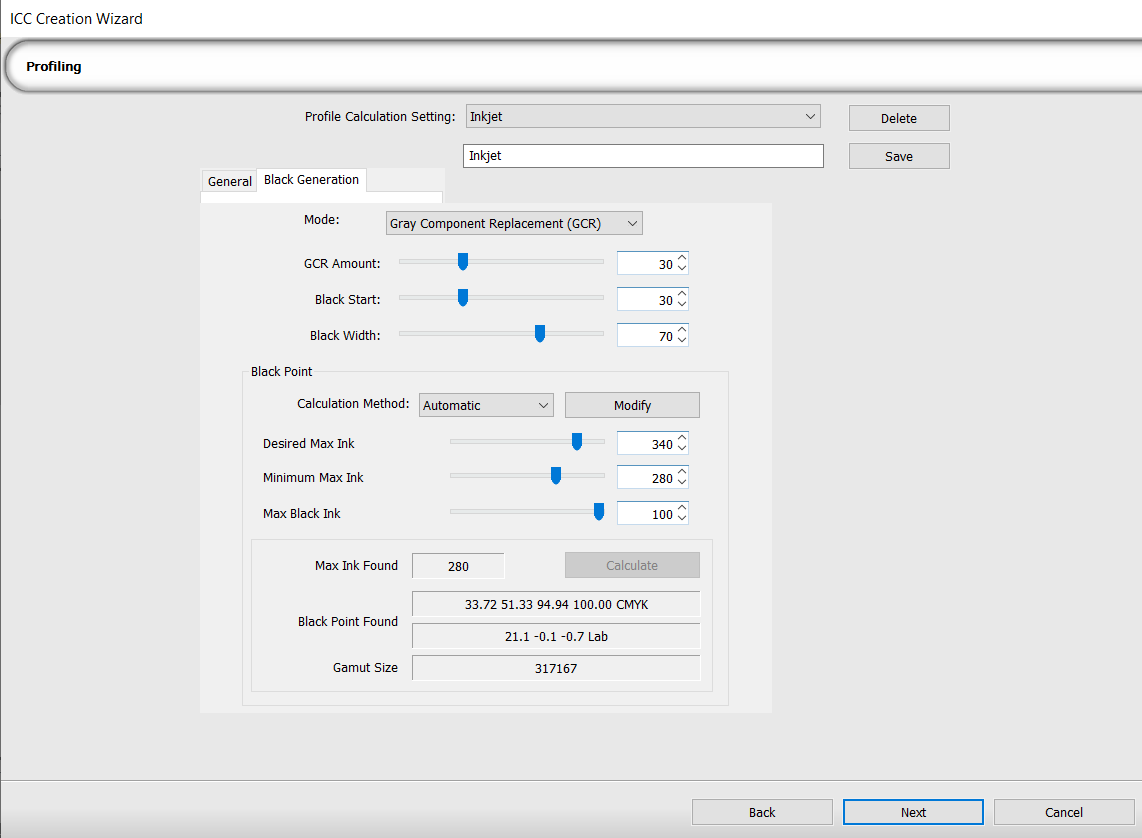
- Switch between tabs and use the table below for help, then click Next.
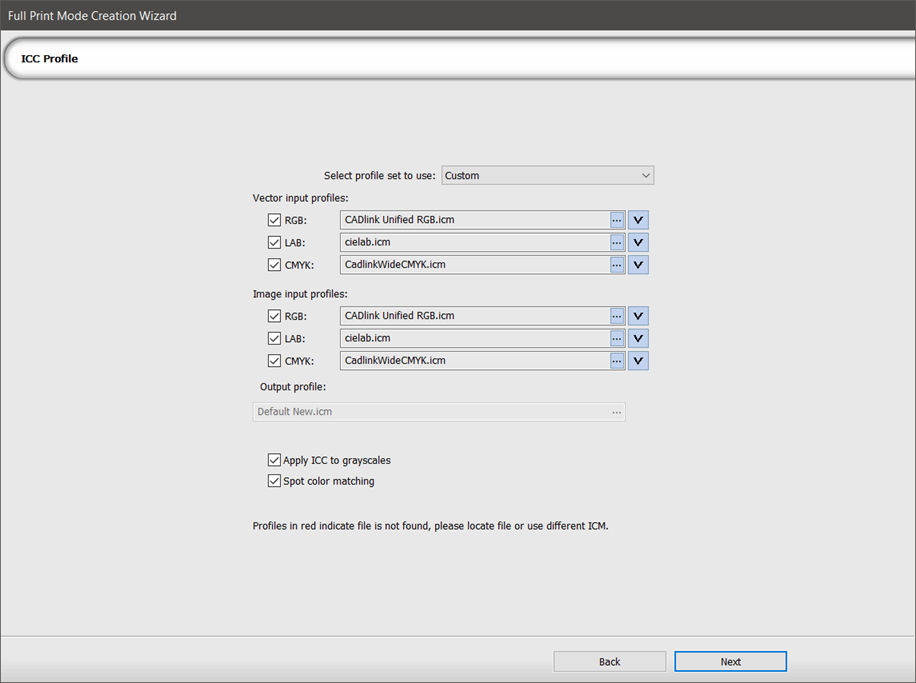
The ICC Profile page appears. - Use the table below for help, then click Next.
- Select an ink set, category, media manufacturer, and media description.
The Summary page appears. - Click Finish.
- To create a print mode package, in the Print Mode Manager dialog, click Create Print Mode Package.
| Default (Inkjet, UV) |
GCR setting is 30 for black generation (less black used and more CMY used). Black ink will not start until 30% grey level shade (less black used and more CMY used). Max K is 400. |
| Low Ink (Inkjet) |
GCR setting is 30 for black generation (less black used and more CMY used). Black ink will not start until 10% grey level shade (less black used and more CMY used). Max K is 300. |
| White Shirts (DTG) |
GCR setting is 30 for black generation (less black used and more CMY used). Black ink will not start until 30% grey level shade (less black used and more CMY used). Max K is 400. |
| Black and Color Shirts DTG | |
| Direct To Film |
GCR setting is 30 for black generation (less black used and more CMY used). Black ink will not start until 10% grey level shade (less black used and more CMY used). Max K is 400. Smoothing set to 50 - GCR=30, BS=10, BW=100, MinkBk=280, MaxBk=400 |
| Laser |
GCR setting is 70 for black generation (more black used and less CMY used). Black ink will not start until 10% grey level shade (less black used and more CMY used). Max K is 240. |
General tab

|
Perceptual Rendering Compression |
|
|---|---|
| Absolute |
Based on a relative colorimetric intent, with colors mapped to closest match (not relative to media color). Works best when input and output gamut is similar. |
| Black Point |
Based on a relative colorimetric intent, with the conversion including black point compensation. Gray scales are converted relative to media color. Works best when input and output gamut is similar. |
| Standard |
Based on absolute colorimetric intent, calculates the perceptual rendering intent for both input and output profiles. Gray scales are converted relative to media color. Recommended default for RGB and CMYK. |
| Chroma | Use the slider to increase or decrease the chroma, resulting in colors looking stronger (more vivid) or weaker (closer to gray), respectively. This does not affect grayscales. |
| Gray Balance | Use the slider to increase or decrease the gray balance, resulting in colors looking cooler (more blue, purple, and green undertones) or warmer (more yellow, red, or brown undertones), |
|
Measurement Correction |
|
| None | All options are off, including smoothing. |
| Low Quality Chart | All options are on and smoothing is 100%. |
| Manual |
Select from the following options:
|
|
Viewing Condition |
|
| D50 |
5,000K: A daylight spectrum (sunny). Note: The standard viewing condition for desktop publishing monitors. |
| D65 | 6,500K: A daylight spectrum (overcast). |
| Kelvin |
Enter a value in Kelvin to indicate the hue of a specific type of light source. |
Black Generation tab
Note: Not available with RGB printers.

 Black Generation Settings in ICC Creation
| Mode |
Select from the following options as a separation method:
Note: All calculations below are based on this selection. |
| GCR Amount |
Corresponds to the amount of black used instead of CMY; increasing the value increases the amount of black (at 100, black is linear). Lower values affect shadows and higher ranges affect light and dark areas. Note: Only available if Grey Component Replacement (GCR) mode is selected. |
| Black Start | Use the slider to control the black start. This is the point at which black is used once CMY passes the set value. Lower values correspond to no black. |
| Black Width |
Use the slider to control the black width. This is the range of values outside of the neutral area in which to generate black. Lower values correspond to less black being used as the width does not fall outside of the neutral zone. Higher values correspond to more black as the width falls outside of the neutral zone and more gray is visible. |
|
Black Point |
|
|---|---|
| Calculation Method |
Select from the following options:
|
| Modify | Opens the Modify Color Gamut window. Use the window to manually adjust the color gamut. Details on how to do so, as well as why you may want to, can be found in Modify Color Gamut. |
| Desired Max Ink | The highest value for maximum ink usage. Set if you know the desired maximum value for bleed. Recommendation: Use automatic calculation. Note: You cannot set this value lower than Minimum Max Ink. |
| Minimum Max Ink |
The lowest value for maximum ink usage. Typically 200 for bleed on inkjet printers, but can be set higher for UV printers. Note: You cannot set this value higher than Desired Max Ink. |
| Max Black Ink | The highest amount of black used to get a good black with ink jet printing. |
| Calculate | Click to calculate the black point. |
| Max Ink Found | Displays maximum ink found based on tab settings. |
| Black Point Found |
Displays the black point in CMYK and Lab. This is the darkest point in your profile and the maximum amount of ink used. The best black point does not always use max ink due to density and reflection. |
ICC Profile

| Select profile set to use |
|
| Vector input profiles | All six of these profiles form a profile set (a grouping of input profiles). Three are vector (RGB, LAB, CMYK) and three are bitmap (RGB, LAB, CMYK). To use different input profiles for bitmaps, select Image input profiles. |
| Image input profiles | |
| Rendering |
Click the drop-down arrow to display the Rendering dialog.
The rendering intent determines how these colors are mapped from the input profile to the output profile. |
| Output profile |
Displays the new output profile. |
| Apply ICC to grayscales | |
| Spot color matching | Select to enable spot color matching. If the graphic contains spot colors and the colors are not correct, try disabling this option. |