Text Tools
The text tools can be used to compose and edit text and create menu boards.

Note: For text that has already been added, right-click and select Settings to open the Text Style dialog to select which style elements to copy.
To copy a style from one text frame to another:
- Select the text frame with the style you want to copy, then right-click and select Copy Style.
- Select the text frame to which you want to copy that style, right-click and select Paste Style.
- The style is copied.
Da sinistra a destra:
Text compose: Select to draw text frame by clicking and dragging. See SmartBar controls below in Frame text compose.
Frame text compose: Select to begin typing in a pre-drawn text box frame and use the SmartBar to edit.

- Font detective: Detects current font and enables selection editing, including font installation.
- Select font.
- Ligature replaces more than one character with a glyph
- Apply default settings
- Set text direction.
- Set line layout direction.
- Justify text left, center, or right.
- Select character color.
- Set font height.
- Set line spacing.
- Set word spacing.
- Enter kerning percent.
- Set custom word spacing.
Note: If the "space" character is not working, ensure width is not set to 0 (zero) or disable Custom Word Spacing. - Set kerning to automatic.
- Insert special character.
- Insert bullet list.
- On-screen kerning: Select to enable on-screen kerning.
- Uppercase/Lowercase: Modify selection to upper or lower, name case, or drop caps.
- Spellcheck
- Superscript/Subscript: Modify selection to super or subscript. Highlight more than one character, click the drop-down button, click superscript, subscript, or unscript. The effect is applied after the first highlighted character. (For example, if "apple" is highlighted and the superscript effect is applied, the result is "apple".)
- Frame, Menu, Line, Character: Opens Text Toolbox dialog.
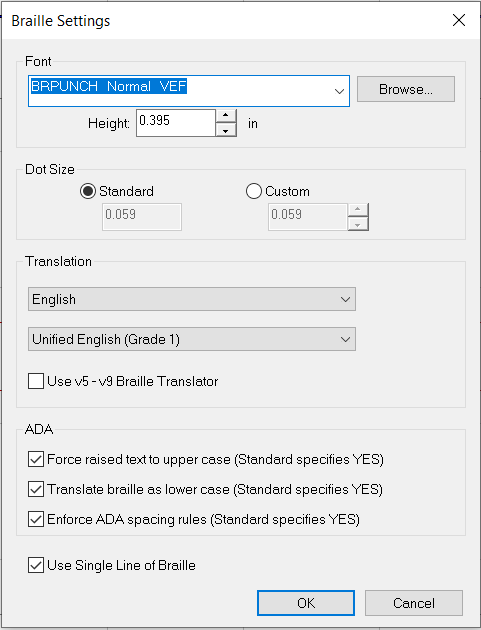
- Braille settings: Click to modify or use the drop-down to open the Braille Settings dialog (select the font, font height, dot size, translation, and ADA settings).
- Undo
- Redo
Text on-screen kerning: With text selected, enables selection nubs per character for manual text kerning.
Text search and replace: Opens Find and Replace dialog for text editing.
Note: If Match Case is selected, only exact instances are replaced.
Menu board: Draw a menu board layout with headers and open the Menu Section Layout dialog to enter the number of rows and columns, specify width and spacing, and click OK. The Text Toolbox dialog appears. Enter text into the cells and edit using the SmartBar.

Convert to Braille: Converts the selected text to Braille. This function uses the settings specified in the Braille Settings dialogue.
Per maggiori informazioni, vedere Text Toolbox dialog.
Fiery family of software products
Making your machines run better
Copyright © 2025, Fiery LLC. Tutti i diritti riservati. Informativa sulla protezione dei dati personali.