Note: These materials are offered only in English as supplementary examples for a deeper dive into
Creating Bevels
You can create a bevel effect for text in
In this example, we're going to create some text, then apply the bevel effect, plus a transformation.
This is what the text looks like before we apply any effects:

- Go to Text Tools > Text Compose and enter text.
- Select the text, and go to Image > Fiery Effects > Fiery Bevel.
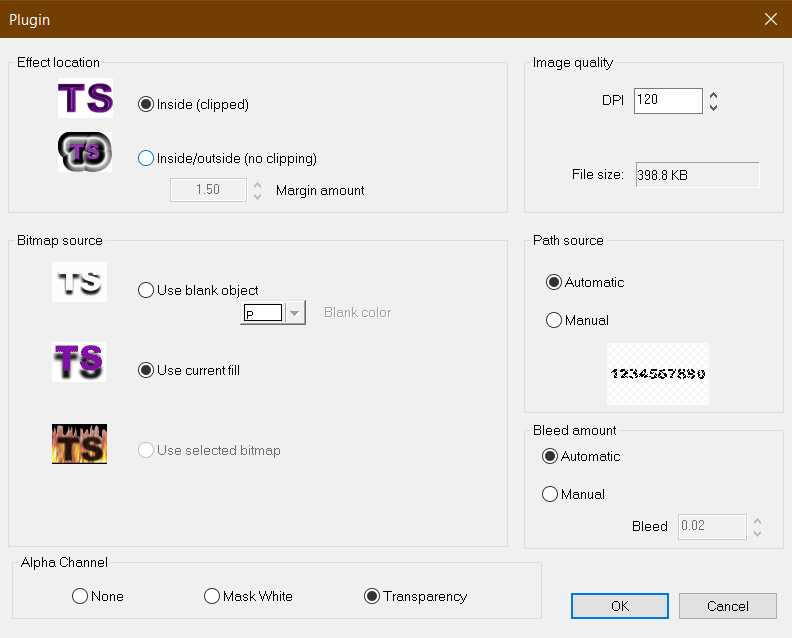
The Plugin dialog appears.
- Use the table below to help select options for the Plugin dialog, then click OK.
The Fiery Bevel dialog appears. - Use the sliders to make changes to your bevel. Rotate controls the colors.
- Click a color to select a new one, and set the intensity of that color by adjusting the sliders. Use the preview on the right to ensure the shadows and light areas are set correctly. You may need to adjust the order of selected colors.
- Set the position and if desired, set the mid peak.
- To save your settings for a future job, click Settings > Save As.
- To load settings from a previous save, click Settings > Load.
- When finished, click OK.

| Effect location |
Inside: Effect is inside the text. Inside/outside: Effect can be placed inside the text or extend outside of the text. |
| Bitmap source |
Use blank object: Select the fill color. Use current fill: Use the fill you have applied to the text. Use selected bitmap: Use the bitmap's color. |
| Alpha channel |
None: Do not create an alpha channel. Mask white: Create a white alpha channel for masking. Transparency: Create a transparent alpha channel. |
| Image quality |
Set DPI (resolution changes with DPI change). Recommend using a minimum value of 120 DPI. |
| Path source |
Select path settings. |
| Bleed amount | Select bleed settings. |
Applying a transformation
- Select the bevel, and go to Transform > Transformation.
- Select a transformation and drag the handles to apply.
