Note: These materials are offered only in English as supplementary examples for a deeper dive into
Graphtec Barcode Support
FC9000 Series
To use the barcode feature on the Graphtec FC9000, you must use the correct drivers (which have barcode in the name).
The original drivers that do not include barcode in the name were created before we added the barcode feature and will work, but not using the new Barcode/Data Link feature.
Once installed in Queue Properties > Production Markup, four registration systems have been added for the Graphtec.
Graphtec Type 1 Barcode Roll Mode & Graphtec Type 2 Barcode Roll Mode
In most cases you will want to use:
Graphtec Type 1 Barcode Roll Mode
or
Graphtec Type 2 Barcode Roll Mode
The Graphtec Type 1 Barcode and Graphtec Type 2 Barcode are for Sheet mode and more commonly used on the Graphtec flatbeds (see below). Select your preferred Type 1 or 2 and enable the Barcode option (and if required Segment marks). The segmented marks work identically to the segmented marks in Graphtec Type 1 (& 2) Segmented registration system.
Note: The Graphtec always works in Page mode (not content) and that is because it requires the registration marks to always be in the same horizontal position for multiple jobs in order to do continuous cutting.
As this means the registration marks will always be position at the full width of the media, in some case due to print margins this can cause part of the marks to be clipped, it is therefore a good idea to add a small margin of 3-4mm / 0.15”.
You can then print multiple jobs to your Roll feed printer, each with their own barcode, and when you are ready, take the roll and load it into the Graphtec cutter.
Chapter 12 Data Link of the Graphtec User manual covers the setup required on the front panel of the cutter. If you are using this for the first time, you must configure the Graphtec cutter for the correct destination of the Data Link.
-
Press the Pause/Menu (menu is displayed).
-
Press the POSTION (>) key (LINK).
-
Select the (1) key (DESTINTATION).
-
Select (2) for Server USB (Graphtec is connected via USB) or (3) for Server Lan (Graphtec is connected via TCP/IP).
Ensure the machine is on and start the Cut Spooler by selecting Start Cut Spooler in the Queue menu or using the shortcut Icon. This will start the DataLink server communications.
On-board the cutter, press the Barcode button. This will bring you directly to the Pause/Menu > Link > Continuous Operation option.
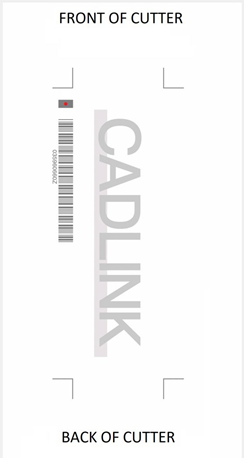
Move the knife above the solid rectangle beside the barcode.
Press Enter to start the cut. Once the cutter scans the barcode and cuts the job, the knife will position itself at the bottom of the job and begin scanning down the roll for the next barcode. This process will continue until no jobs are left.
When it has finished and can no longer find any new barcodes for subsequent jobs, you will need to press the OK button to clear the buffer before starting the next roll.
Graphtec Type 1 Barcode & Graphtec Type 2 Barcode
These registration systems are designed to cut sheets at 90-degree angles (mainly for flatbed cutters.) Both these systems can be used without the barcode. To use the barcode features, enable the barcode in the Markup System Settings controls group then add and print a job. Take the printed job and cut it off from the roll. Load the sheet into the cutter in the orientation shown in Fig 1 (90 degrees from the printed direction.)
Ensure the machine is on and start the Cut Spooler by selecting Start Cut Spooler in the Jobs menu. This will start the DataLink server communications.
On-board the cutter, access the menu by pressing Pause/Menu, select the Link option, then Barcode Cut. A popup will come up asking you to choose the Barcode Type.
Select Standard Barcode and move the knife over the solid rectangle right above the barcode, the red dot in the image below indicates where to position the knife (the red dot will not appear on the actual printout.) Press Enter to start the cut.
Fiery family of software products
Making your machines run better
Copyright © 2026, Fiery LLC. All rights reserved. Privacy Policy.