Note: These materials are offered only in English as supplementary examples for a deeper dive into
Layers
This example briefly explains layers and gives tips and tricks for making your workflow easier.
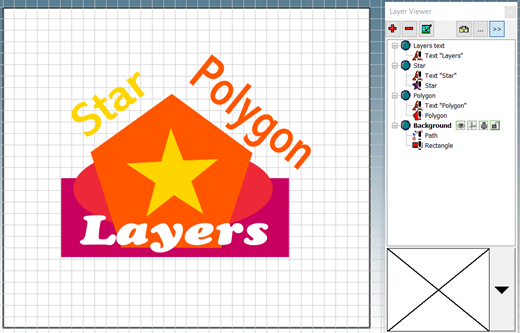
On the left side of the image is the sign blank with several shapes and three separate text boxes. On the right side is the Layer Viewer. The Layer Viewer has four layers, each one containing the matching text and shape, except for the background shapes and the text “Layers”.
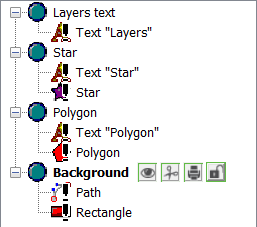
To add or delete a layer, click the plus or minus buttons.
Next to a selected layer, there are options to:
- Show or hide the layer.
- Turn cutting on or off for the layer.
- Turn printing on or off for the layer.
- Lock the layer from editing.
It’s easier to control related objects when they are grouped together in one layer.
To edit layers and re-name them, right-click on the layer. Drag and drop objects into layers to reorganize them. For example, if you hide the “Star” layer, the star and text “Star” are no longer visible since they’re grouped.
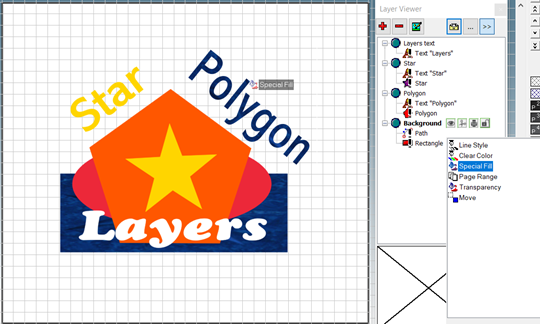
When an effect is applied to an object (for this example, a blue pattern fill on the background rectangle), you can copy it to another object easily. Click Object Attributes in the Layer Viewer, then click and drag the effect to an object to apply it.
To check an object's layer, select the object, and check the bottom of the workspace:
If you turn off the layer viewer, you can merge all layers back into a single layer to make editing easier. Go to Show Context Menu and Merge All Layers. To always merge layers on import, see Merge layers on import.
Fiery family of software products
Making your machines run better
Copyright © 2026, Fiery LLC. All rights reserved. Privacy Policy.