Shape Tools
The shape tools can be used to create shapes

From left to right:
Circle, Ellipse, Rectangle, Polygon, Star, Arrow, Fan
Note: When drawing shapes:
- Hold the Shift key to center the shape on the spot you began drawing.
- Hold the Ctrl key to create perfect shapes (same size on X and Y), with the exception of the arrow, which snaps to a horizontal line.

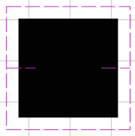
Weed border: Select to create a weed border (an extra rectangular cut around the shape). Specify border offset.

Power weed: Select to create weed border and horizontal and vertical mid-weed lines. Specify border offset and line overlap. To create new mid-weed lines, click the top or side edge of the object and drag the mouse horizontally or vertically. Click the "Weed Text Lines" button to toggle weeding lines through text.

Decorative border: Select to create a decorative border around an object.

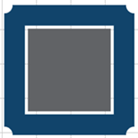
- Select square, rounded, notched, or inside notched border.
- Specify inside/outside corner radius.
- Select single path border or border with thickness.
- Select border color.
- Specify border thickness.
- Displays width and height.
- Specify horizontal and vertical offset.
- Lock or unlock this border from editing.
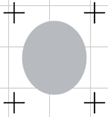
Registration mark: Select to manually place a registration mark (see Registration Marks).

Multi-registration mark: Select to place multiple registration marks (see Registration Marks).
Stencil: Select to apply a clipping style to one or more objects. The existing object is viewed through the stencil.

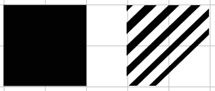

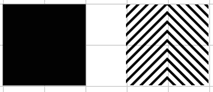
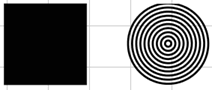
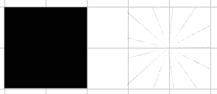
- Select horizontal linear stencil, vertical linear stencil, square stencil, circular stencil, or conical stencil.
- Set angle.
- Specify number of repeats.
- Specify x,y origin
- Set thickness and spacing.
- Set variation on thickness and variation on spacing.
- Select Variable to edit thickness and spacing variations.
Ruler: Select to draw ruler. The Ticks Marks and Labels dialog appears. Use the Minor and Major Tick tabs to set the number of ticks, spacing, size, and labels,

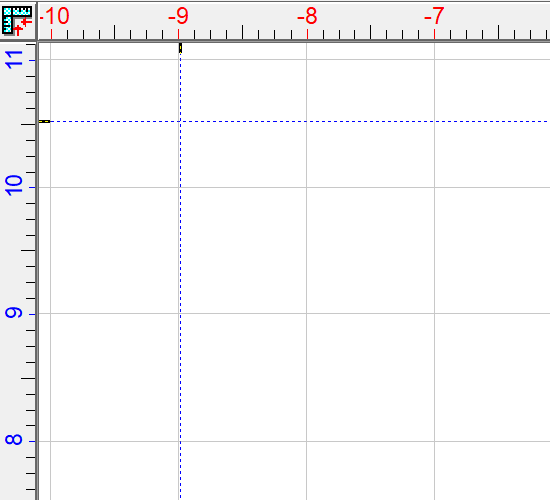
- X, Y coordinates
- Length
- Angle
- Thickness
- Draw baseline
- Tick positions
- Launch dialog
Dial: Select to draw dial ruler. The Ticks Marks and Labels dialog appears. Use the Minor and Major Tick tabs to set the number of ticks, spacing, size, and labels,

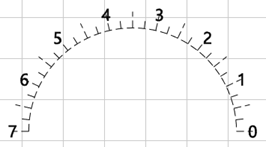
- X, Y coordinates
- Start angle
- End angle
- Flip angle
- Radius
- Thickness
- Baseline
- Direction
- Tick positions
- Launch dialog
Barcode: Select to create a barcode.

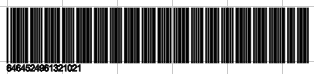
- Bar height: Specify barcode height. Select Auto to automatically set height.
- Bar width: Specify barcode width.
- Bar ratio: Specify the wide-to-narrow bar ratio (when available).
- Value: Enter the characters encoded into the barcode (each barcode type has unique rules for entry of numbers, letters, and extended characters).
- Barcode symbology: Select the type of barcode symbology.
- Configure caption: Click to open Barcode Caption Features dialog. Enter a caption and specify font settings and specify the caption position.
- Angle: Select the barcode placement angle.
- Checksum: Specify to calculate and apply a checksum character to the barcode.
- Append: Select to connect multiple individual barcodes into a single, long barcode. When creating barcodes to append, ensure Append is selected.
- Set Position: Toggle On to enable the barcode to be automatically placed at the origin point. The nub selector next to the check box determines which point is placed at the origin point.
- X/Y Coordinates: Values adjust how far the barcode is placed from the origin point when Set Position is enabled.
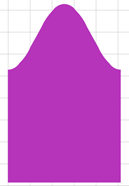
Monument: Select to draw a parametric monument shape. Press Ctrl to form a perfect square. Set origins, width, height, and bulge. Select Arch to create an arch shape at the top.
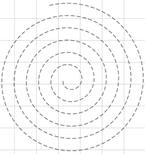
Spiral: Select to draw a parametric spiral shape and adjust it using the nodes (center node = position spiral; middle = adjust the spacing; outside = number of loops).
Specify x,y coordinates, the revolution of the starting point, the number of revolutions, and the distance between revolutions.
Fiery family of software products
Making your machines run better
Copyright © 2025, Fiery LLC. All rights reserved. Privacy Policy.