Badges / Multiples
You can create badges, which are duplicates of a design, where new text can be substituted into each badge from a text file.

Creating Badges
- Create an initial design with graphics and text objects.
Note: Do not group text objects and ensure text is not converted to line art. - Prepare a text data file with the variable information for your badges and save as a .txt file.
- Create the badges using Layout > Badges, using the Badge Setup dialog table as guidance.
- Choose the substitute text using the Replacement data file checkbox and locate the desired data file.
- Highlight the variable text in the Replacement items / text field.
- Enter all other selections in the Badge Setup dialog (see below) and click OK.
If you selected one or more text fields, the Text Substitution dialog appears. - Once all data is entered and serialized, click OK again to create the badges.
Using spreadsheet files for Text Substitution
The replacement data file function has been expanded to support spreadsheet data files such as .xlsx and .csv file types. Similar to using a .txt file for substitution, the text to be changed must be highlighted in the Replaceable items/text box.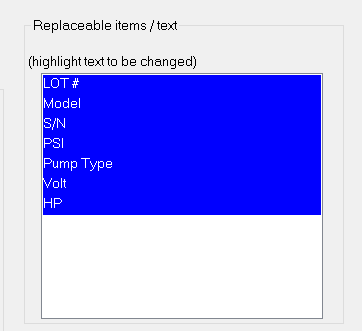
Once each item is highlighted, ensure the Replacement data file checkbox is toggled on, and find the desired spreadsheet data file using the browse button (it may be required to change the default display to show more than just .txt files). When the spreadsheet data file has been selected, the Excel Spreadsheet Badging window will populate the screen.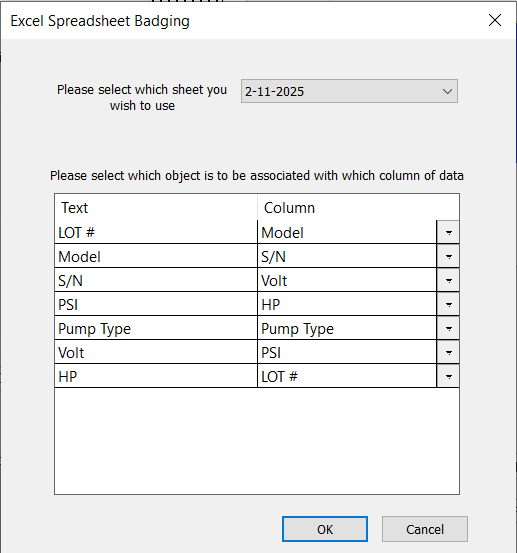
In the event the spreadsheet data file contains multiple sheets, the dropdown at the top can be used to specify which sheet should be used to substitute the data. Use the column field dropdowns to assign each replaceable text a column from which to obtain the new data.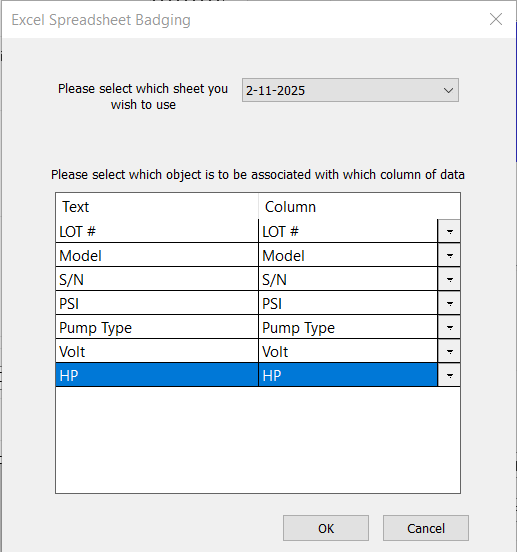
After the columns have been assigned, click OK to finalize the dialogue. Continue with the badge process as described in the next steps.
Editing Data in the Text Substitution dialog
- To select column content, click the column header.
- To edit the data, use the following functions:
Function Commands Shortcuts
F2 Copy selected cells F3 Paste selected cells F4 Cut selected cells F5 Delete selected cells
The Text Subsitution dialogue also contains a "Clear Row" button. This works while at least one row is selected. Multiple rows can be cleared at once by using shift +click to select additional rows. The row itself is not deleted, only the contents of the row are removed.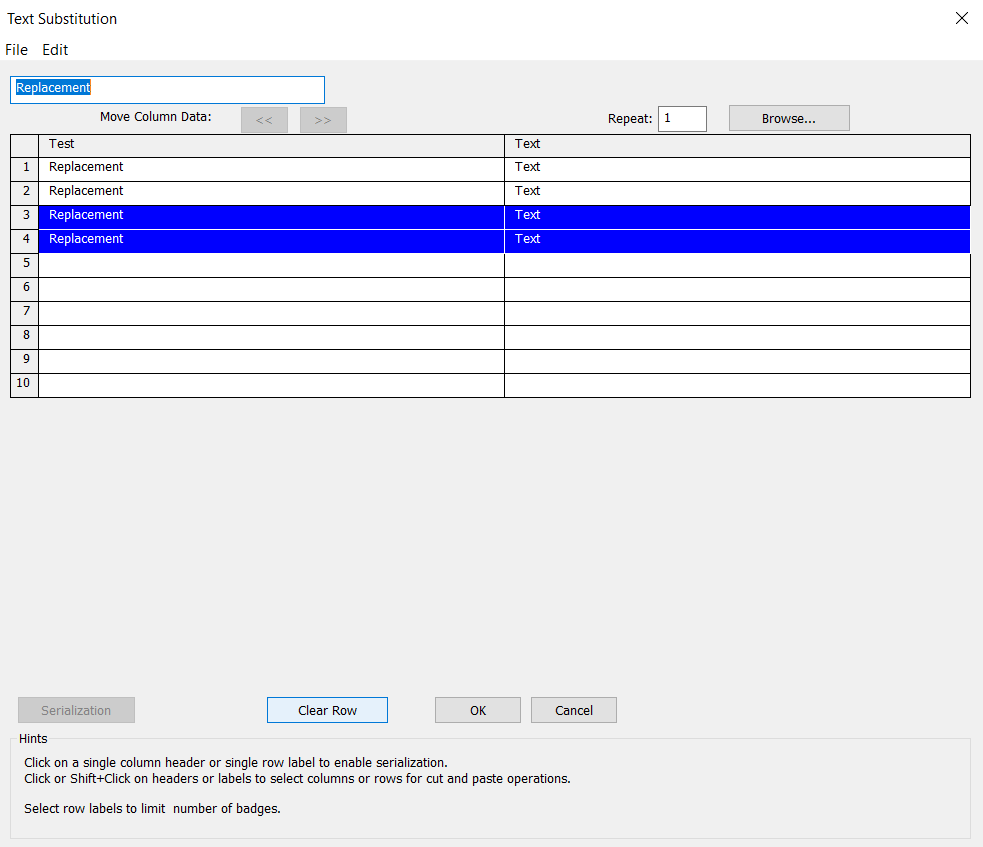
- Click Serialization.
The Serialize dialog appears.
Serializing a column
- Enter a Start value (default is initial data).
- Define the Increment and Repeat value.
- Select an option to define the series as numeric or alphabetic.
- Click Set as Base.
The variable text portion is highlighted. - Click OK.
The Text Substitution dialog is updated and column data is serialized.
Repeats
The repeat option in the text substitution window allows users to repeat each substitution a specified number of times. To repeat data in the text substitution window, select the cell(s) with the data you would like to repeat. Once selected, navigate to the repeat box, and enter the desired number of repeats. Press the Enter key while still in the repeat value box, and the selected cell(s) will be repeated accordingly.

Any data below the repeated cells are shifted down to accommodate for the repeated data. The repeat cannot exceed the number of copies specified in badges setup window.
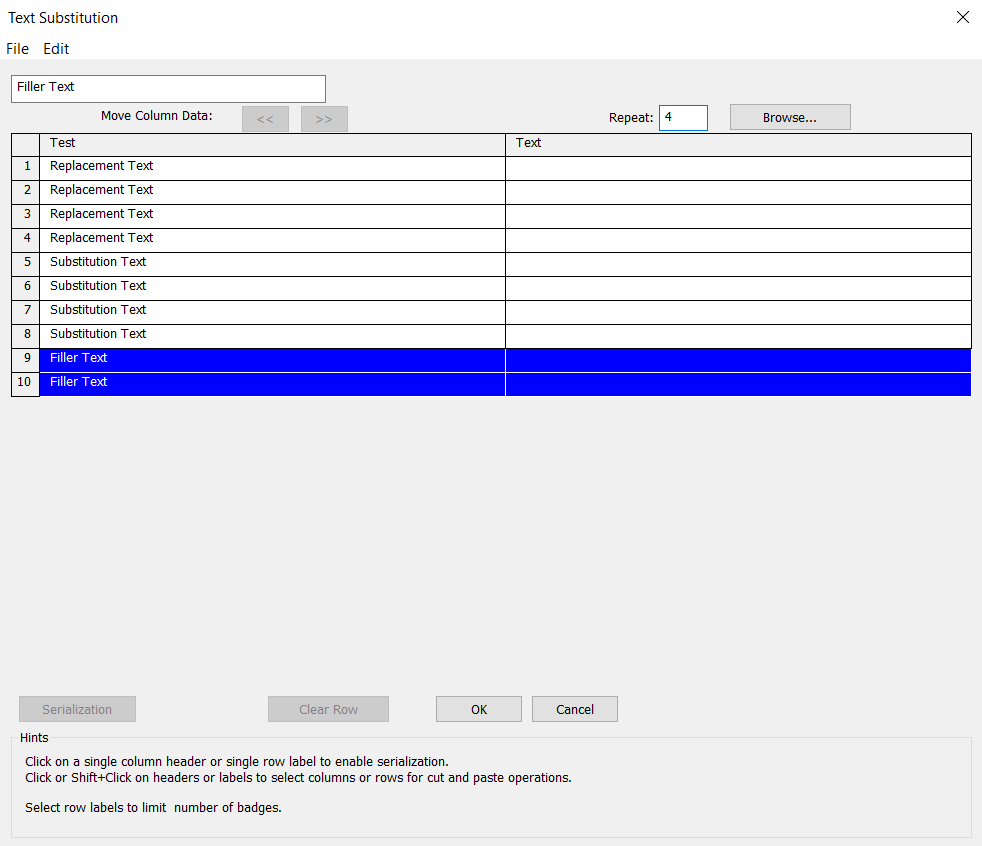
The example above has the number of copies set to 10. When repeat 4 is used for each cell, the last set gets cut to 2 as it cannot exceed the total number of badges.
Repeats can also be applied to entire columns or rows. Simply select the desired columns or rows (shift + clicking each desired row or column), and then apply the repeats the same as before.
Badge Setup Dialog
|
Use the table to configure |
|
|---|---|
| Number of copies | |
| Max copies per page | |
| Drop-down list | Select crop marks or lines. |
| Use plate | |
| Color | |
|
|
|
| Custom size | |
| Height | |
| Width | |
| Top margin | |
| Left margin | |
| Bottom margin | |
| Right margin | |
|
Spacing |
|
| Vertical | |
| Horizontal | |
| Replaceable items and text | |
| (highlight text to be changed) |
Select variable text. |
| Create Clones | When enabled, each created badge is a clone of the original object selected for the badge process. See Clones for additional information. |
| Group each badge | Enable badge grouping. |
|
Page preview |
|
| Position radio buttons | Select a starting position for badge arrangement. |
| Horizontal | Enable horizontal layout. |
| Replacement data file | Enable a replacement file. |
| Blank field | Enter the file path, or use the Browse button. |
| Data drop-down | Select the delimiting character of the data file. |
| Total number of pages | Enter a value. |
Page control
Use the buttons at the bottom of the workspace to move between pages after creating badges.

Page 0 is the default workspace. When there are multiple pages, objects on Page 0 are visible on all pages.
Click  to add, collapse, or delete pages.
Note: When collapsing pages, the offset value is in addition to the size of the blank (offset = blank size + offset value).
Note: If you have selected Do not allow page 0 objects to be modified on other pages on the General Options tab of the General Preferences dialog, page 0 objects are locked on other pages.
Fiery family of software products
Making your machines run better
Copyright © 2025, Fiery LLC. All rights reserved. Privacy Policy.