Transform Menu
The following items are located under the Transform menu.
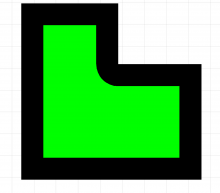
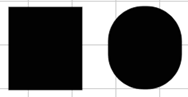
Outline: Create an outline or inline.
Outlines

Note: If the outline color is the same color as the object, the object becomes a polyarc.
From left to right:
- Outline on
- Outline thickness
- Outline passes
- Outline offset
- Outline color
- Outline point
- Outline clipped: Set miter limit
- Outline round
- Inline (same options as Outline): Rounds inline corners of shapes.
- Keep original
- Create mask: Welds all outlines into a single object. (When more than one object is selected, outlines are created for each object.)
- Miter limit: Only corners less than or equal to 90° are clipped.
Transformation: Select to transform an image using the bounding box, perspective, or fit. Drag the handles to modify the image and click on the workspace to apply. Use the tool tips in the SmartBar to see functions.


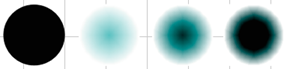
Bitmap Transparency: Incorporate a complex transparency pattern into a vector shape.
- Convert to Bitmap Transparency: Select using a bitmap under and a vector on top to create a transparency fill based on the bitmap.
- Make Pattern Darker: After converting to bitmap transparency, select to make transparency pattern darker.
- Make Pattern Lighter: After converting to bitmap transparency, select to make transparency pattern lighter.
Chisel Effect: Select to create a 3D effect. Select light and shadow color, along with bevel and ridge color and width.


Fit Text to Arc: Select to position text to fit the baseline or top-line to a circle. The arc angle is the total arc and the arc radius is the radius of the path.
If custom is selected, see Line Length Compression dialog.


Fit Text to Path: Select to fit a text shape to a vector shape (or "path").
- Inside path: Path is aligned along bottom of text (including descenders).
- On path: Path is aligned along text baseline (excluding descenders).
- Through path: Path crosses directly through middle of text.
- Outside path: Path is aligned along top-line of text.

Fit Text to Frame: Select to enable a vector to serve as a text frame. Use by selecting both the text and the shape, or select the shape, choose the text compose tool, press Ctrl and click along the shape contour.
Fit Object to Path: Select with two shapes selected to fit multiple copies of the smaller shape to the bigger shape (useful for border decoration). In the Fit Object to Path dialog, indicate the:
- number of shapes to create
- distance between shapes (object spacing)
- offset from the starting point
- nodes to transform the nodes to the selected shape
- rhinestone spacing
- rotation of the copies
- follow contour for the copies to align to the larger shape portions
Fit to Shape: Fit text to the inside of an object, dynamically scaling the text with the object edges. For more information, see Fit to Shape.
-
All Directions: Fit the text using both vertical and horizontal edges.
-
Horizontal Transformation: Fit the text using only horizontal edges.
-
Vertical Transformation: Fit the text using only vertical edges.
-
Shape Control: Adjust the amount of points in the text used to adjust the fit within the object.

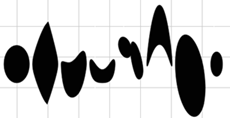
Metamorphosis: Select to create multiple shapes between two objects that represent the transition from the first shape to the second shape.
Modes:
- Target layer: Transition shapes use the color selected in the shop palette.
- Match layers: Transition shapes use transitional colors that are the closest matches in the shop palette.
- New layers: Transition shapes use transitional colors that are the closest matches in the shop palette. If a given color doesn't exist, new layers are created and added to the palette for the best match.
- Group all: Select to group all shapes created in transition on one layer.
- Count: Enter the number of shapes.

Shadow: Select to apply shadow effects to selected shapes, according to style, color, coordinates, angle, depth, cast, and outline (by default, the shadow is centered on the shape at 0,0).


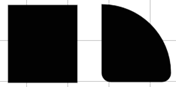
Round Corner: Select to round inner or outer corners of a shape and set radius.

Fillet Round Corner: Select to round individual corners by selecting them and set radius. If miter is enabled, the corner is clipped instead of rounded.

Render to Bitmap: Select to create a bitmap from a vector. Set the color depth, image resolution, ensure the file size is good, and click Apply.

Render Contour Bitmap: Select to create 3D chiseled or beveled patterns using process colors. The Contour Bitmap dialog appears. Enter a DPI, and select:
- Constant slope: Select for effect to reach maximum depth and height at the same rate.
- Constant height: Select for effect to dip or peak along the center line.
- Direction: Select if using lettering.
- Select Keep original or Clip Result (to clip to the original object).


Render Multi-tone Bitmap: Select to convert a full-color image into a monotone, duotone, tritone, or quadtone image. Pick colors for each tone and edit the tint (in the graph, the top left corner is 0% tint, the bottom left corner is 100% tint and 100% shadow, and the bottom right corner is 100% highlight).

Select Keep original or Clip Result (to clip to the original object).
Render Pattern Fill Bitmap: Select to prepare an image for tiling using pattern fill. Enter a name, set the resolution, and select a color depth. The pattern bitmap is saved in the Fills directory and can be applied using the Pattern Fill tool (see Stroke and Fill Tools).
Note: C:\Fiery\[program name]\Fills
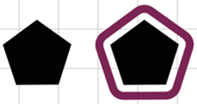
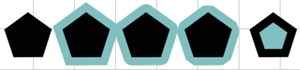
Contour Object: Select to create a single shape that matches the contours of the selected object. Contour the inside or inside and outside of a shape, select the corner style, the offset, and the color. You can group the objects, clip, or invert the bitmap.

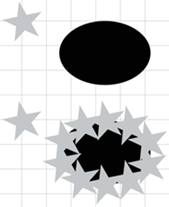
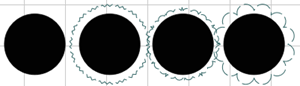
Decorative Cut: Select to create fancy cut patterns based on shape contour. Select a cut type, define the length, height, and offset. Define a contour color that is different than those used in your shape (see Slice Tools).

- Rhinestone Fill: Select to apply rhinestone fill to an image or object. Select outline or fill, select the rhinestone elements, and adjust the settings.

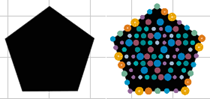
- Drop Rhinestone: Select to stamp one or many rhinestones onto an image or object. Select an element category, an element, a color, and click Add.
- Replace with Rhinestones: Select to replace objects of similar color, name, or size with chosen rhinestones.

- Create Rhinestone Object: Select to create a rhinestone with a name, diameter, and cost.
- Convert to Rhinestone Object: With an existing rhinestone selected (opened from the CDL file
- Add New Rhinestone Object: With an existing rhinestone selected (opened from the CDL file
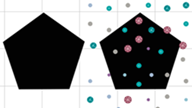
- Scatter Rhinestones: Select to scatter chosen rhinestones in a pattern. Set the offset, edge density, and center density of the rhinestones.

Opens the Effects Window, allowing users to browse and apply a variety of effects to the selected vector object or text. See Effects Window for additional details.
Fiery family of software products
Making your machines run better
Copyright © 2026, Fiery LLC. All rights reserved. Privacy Policy.